
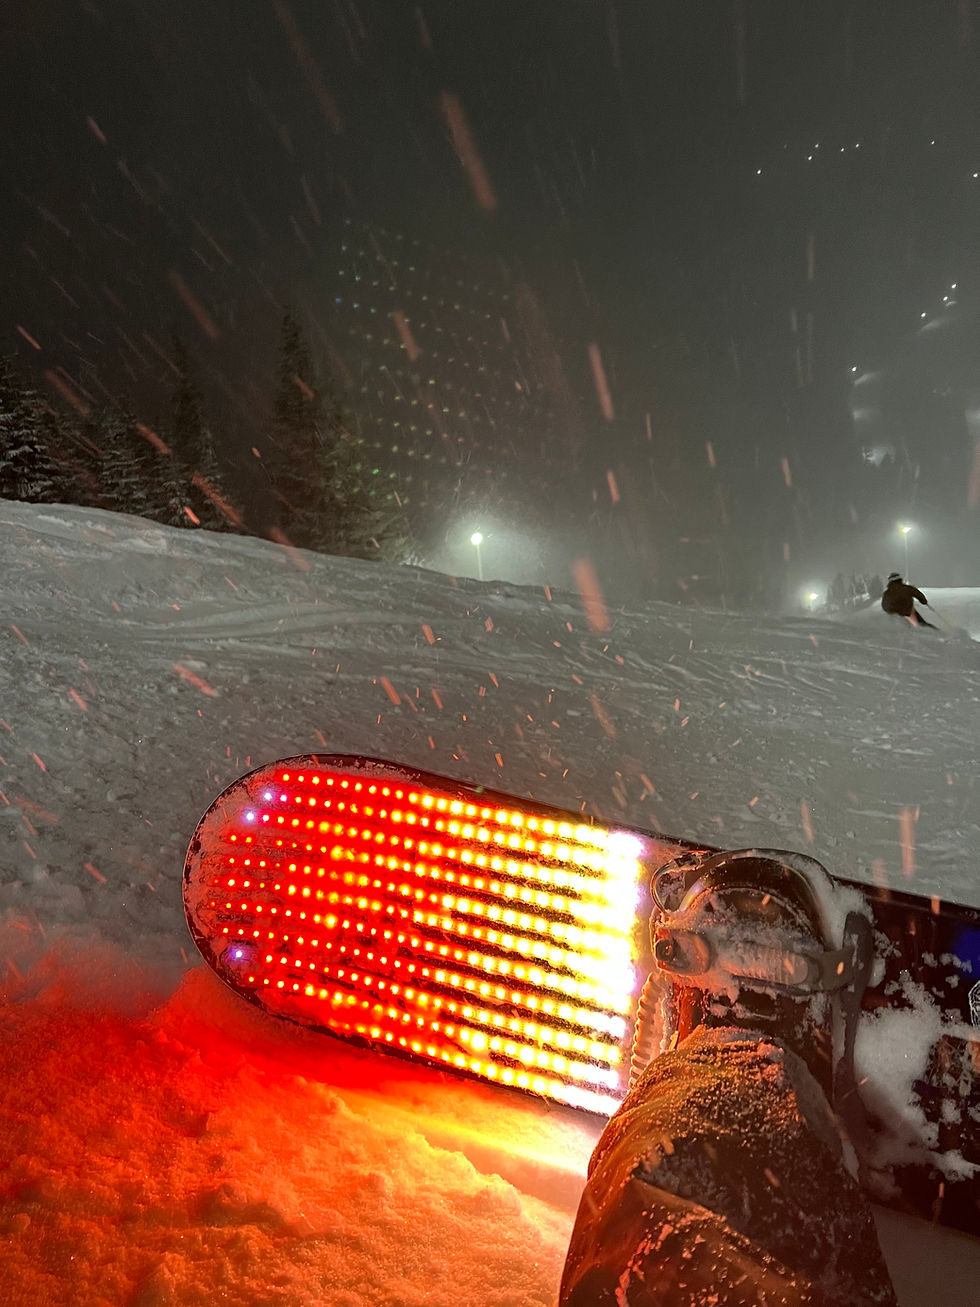
LED Snowboard
Project Type
Personal
Project Overview
This project involved integrating individually addressable LEDs onto a snowboard, controlled by an ESP32 microcontroller programmed using Arduino C. The goal was to create a visually striking display that could withstand the harsh conditions of snowboarding while offering dynamic light patterns

Project Summary
Lessons Learned
(Tap Pics For More Info)

I learned that soldered joints shouldn't be relied on for structural support, especially with vibration, which can loosen them. Reinforcing connections with mechanical connectors ensures durability, allowing solder joints to serve only their electrical purpose.
Soldering & Vibration

Different adhesives work better with certain materials and under specific temperature conditions. I discovered that an adhesive suitable in one context might fail in another due to temperature changes or material differences.
Adhesive Compatability

Field testing can reveal issues not evident in lab conditions. For example, I initially used a straight wire cable but found that it transmitted vibrations from being too rigid. Switching to a spiral coil cable provided the necessary flexibility while additionally making setup and operation much easier.
Field Testing
Importance
of
Inspiring
Design
I want to candidly talk about the effect that this project had on people. I had so many people come up to me while snowboarding to compliment my board and let me know how cool it was. People didn’t notice the soldering, the programming, the wiring, or even the LED traits like color and brightness. They were inspired by the beauty of the result from all of it coming together. As an engineer it was important to realize the charm of the project and how it can inspire people not from the tech specs, but by the design.
Final Outcome
The LED snowboard now functions flawlessly, displaying dynamic patterns across the LED array. It successfully withstands the harsh conditions of snowboarding, including vibration, impacts, and various weather conditions. The project showcases skills in design, soldering, programming, 3D printing, and problem-solving, making it a highlight of my engineering portfolio.

Sizing and Cutting LED Strips
-
Sized and cut the LED strips to cover the entire front of the snowboard.
-
Ensured aesthetic distribution of LEDs to match snowbaord front curve.
Soldering and Mapping LED's
-
Soldered the LED strips together, ensuring robust electrical connections.
-
Mapped each LED's position relative to each other on the computer for accurate control and pattern display.


Programming the Microcontroller
-
Programmed the ESP32 microcontroller using Arduino C language.
-
Integrated open-source code for various light patterns.
-
Developed a program to change patterns and adjust brightness via a button connected to the microcontroller.
3D Printing and Housing
-
Designed an enclosure to be compact and durable, ensuring protection against the elements.
-
3D printed the enclosure to house the microcontroller and button.
Power and Connectivity
-
Used an external battery bank connected via USB to power the system.
-
Designed the battery bank and microcontroller hosuing to fit in pants pocket for portability.
-
Connected the microcontroller to the LED strips on the board using a spiral coil cable for flexibility and durability.
Adhesion and Waterproofing
-
Experimented with various adhesives like hot glue and epoxy.
-
Found that silicone adhesive worked best for securing the LEDs to the snowboard.
-
Ensured the silicone tube encasing the LEDs remained sealed to maintain waterproofing.
